
Yesterday I mentioned that I planned to cut off each of these scarves as I weave them and then rethread with a different stripe pattern. Sue asked me how I do this and when I started to answer I realized it'd be a lot easier just to show her.
First, I put lease sticks in the cross behind the shafts and secure them to the back beam:

To do that, I tromp first on one plain weave treadle and insert a stick behind the shafts and then tromp on the other plain weave treadle and do it again. Then I put the handy dandy rings wot my dear ol' Mum gave me for Christmas into the ends of the sticks to keep them together (but not too close together!) and dangle the works from the back beam.
Next I whack the old scarf off:

Normally when you're cutting and tying you want to be very sure to completely release the tension on your warp, else you run the risk of having the ends sproing right out of the reed and maybe even the heddles. In this case, though, they're coming out of the heddles anyway so it doesn't matter so much. I still did let most of the tension off, mind you. I'm just sayin'.
After chopping off the old scarf and untying it from the loom, I pull the threads out of the reed and the heddles and leave them dangling from the lease sticks at the back...

...while I organize my fancy schmancy hang-the-shafts-off-the-castle-from-just-the-right-height-for-threading set up. This is a finely tuned system involving highly engineered parts, namely: little girls' hairbobs, dpns and some cheap shower curtain rings, all of which were obtained at the dollar store. Best three bucks I ever spent!
Let me just say right now: I love hairbobs. They're like tiny little bungy cords, and I use them ALL the time. Occasionally I even put them in my hair.

The dpns hold the shafts up at a comfortable height for threading. They also hold up the hairbobs, which are hooked under the dpn and held in place because the big plastic balls on the end are too fat to squeeze back through the space they're allowed. Over time one of my hairbobs has stretched alarmingly (it's not the only thing!) so I just wrap it around its dpn a few extra time to take up the extra length. The hairbobs are attached to the shower curtain rings at the other end so that they've got easy to open and close hooks just ready and waiting.
Once all that's in place, I take the lease sticks off the back beam and hang them from the castle...


...and I'm all set to thread again!
Now, that's all well and good, but I'm guessing Sue's question was actually more along the lines of "how do you rearrange the order of the threads?" At this point I haven't done - they're all waiting in the lease sticks in the same order they were when I cut off the last scarf.
Here, for instance, are the first five ends which are presenting themselves for threading in the same order they were used previously:

That's not the order I want to use them in this time, though, so I simply thread them out of sequence. You may just be able to tell in this pic that the threads are not threaded in the same order as they appear in the cross:

This may sound a bit alarming since we're all taught to guard our threading cross so carefully and not let anything happen to get the threads out of order. The fact of the matter is, however, that once those lease sticks are pulled out, the threads have no idea what order they were in and couldn't care less.
Well, all right. That's a bit flippant and it's not really quite that straightforward. There is some fine print here, which reads like this: these threads were wound five-at-a-time, and I am always careful to make sure that a thread from one group of five doesn't wander over and get mixed up with its neighbouring groups - they move about within their group but not beyond it. Taking a thread out of its group of five and threading it even an inch or two away can play havoc with your tension and produce tangles. Also, I do this with smooth, easy to manage threads, not hairy stuff nor fragile stuff.
Rethreading like this is easy as pie, but it still helps to have a little assistance (my apologies for the viewing angle here - the only time she stood still long enough to get a pic was when she realized there was nowhere to go up ahead. Besides, while this isn't her best angle, it's still pretty cute. I just love the fluffy little pantaloons she's always wearing):

Once I'm rethreaded, I sley as usual...

... and then I pull out those lease sticks you can still see hanging behind the shafts. I always do so before tying on, since the little bit of criss-crossing the threads are doing in the sticks will play silly buggers with the tension if I don't. I also drop the shafts back down before tying on for much the same reason.

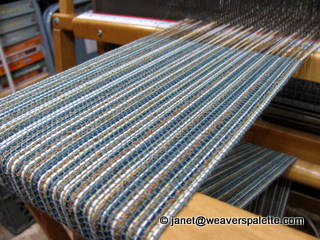
All tied on, now with new stripes!
Here's a comparison of yesterday's stripes with today's:

Makes a difference, huh?


4 comments:
Hi Janet,
While it's always a good idea to learn how to do it 'perfectly', it's not always necessary. :)
There is more than one way to skin a cat (apologies to Miss Pantaloons) or thread a loom. ;^)
Cheers,
Laura
Very cool -- and very clear! OXOXO Mom
Wow - thanks for that great explanation and for the pictures to go with it!!! I feel like I really understand it now!!
Loved the cat getting involved! (Although I'm also happy that my dog stays on the floor - although he does steal balls of yarn whenever he can.)
Weave on!
Sue
Very interesting to see the whole process! And you did a great job of explaining it.
You're right, those hairbobs are like little mini bungee cords - I'll have to keep them in mind more often when I need that sort of thing.
I did wonder about re-arranging the threads and what that would do regarding tension, tangles, etc. I can see it working the way you describe though.
Post a Comment